Google Earth Format
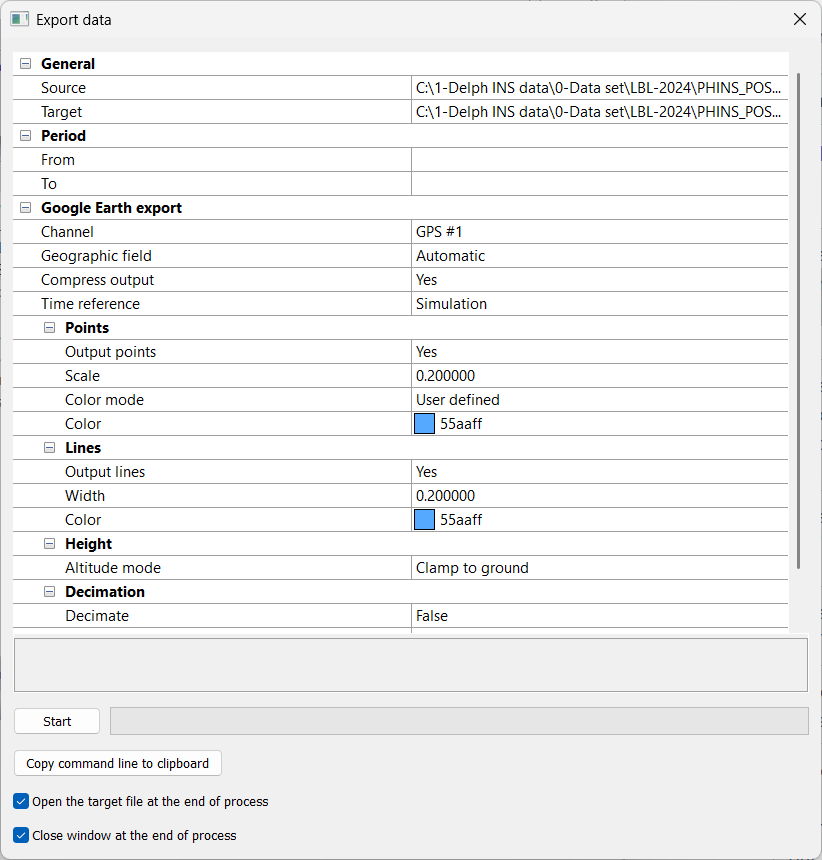
You can export the navigation from a *.xpf file into a “.kml” Google Earth format. The output data file is loaded into Google Earth which may be automatically launched after the export.
|
1.
|
In the Variables panel, right click on the variable and select Export to Google Earth. |
|
2.
|
Click on Source. Click on  and select the XPF file to export in KML format. and select the XPF file to export in KML format. |
|
3.
|
Click on Target. Click on and select the output file (e.g.*-ins.xpf.kmz) in which you want to export the KML format. |
If the target file already exists, it is overwritten.
|
4.
|
In Period, enter the From and To values to restrict the export on a defined period. |
|
5.
|
Click besides Channel and select the parameter channel in the pull-down menu. |
|
6.
|
The Geographic field used to export geographical information is set to Automatic. |
|
7.
|
Click besides Compress output and select Yes or No in the pull-down menu. |
KMZ (zipped KML) (.kmz) or KML (.kml) are generated.
|
8.
|
If the exported file is a .xpf file, select the Time Reference: |
|
>
|
File: to use the file time reference |
|
>
|
Simulation: to apply the time offsets defined into the project |
|
>
|
In the Output points, select Yes or No |
|
>
|
In the Scale field, enter a value defining the size of the points |
|
>
|
In the Color mode pull-down menu: |
|
●
|
Default, the point color is automatically selected |
|
●
|
User defined, click on Color to open the palette and choose another Color |
|
●
|
Standard deviation, enter the Low SD threshold (m) (if the value is below this threshold, the color is green) and High SD threshold (m) (if the value is greater than this threshold, the color is red), for intermediate values the color is orange |
|
>
|
In the Color pull-down menu, select the color to be displayed. |
|
>
|
In the Output lines parameter, select Yes or No. |
|
>
|
In the Width parameter, enter a value. |
|
>
|
In the Color pull-down menu, select a color. |
|
11.
|
Expand Height, click on Altitude Mode and select the Relative to ground, Clamp to ground or Absolute option. If the Absolute mode is chosen, then click twice on Scale Factor and Offset and enter the values. |
Note: Use the Clamp to ground option for Land mode and Absolute for Airborne.
|
12.
|
Expand Decimation, select True or False. If you choose True then click twice on Value and enter the decimation interval. Decimation keeps one point every N points. |
|
13.
|
You may select the Open the target file at the end of the process and / or Close window at the end of the process options. |
|
14.
|
Click on the Start button to run the export. |
The file is automatically displayed into Google Earth at the end of the export. In Google Earth, you have access to the Points and Track displays.
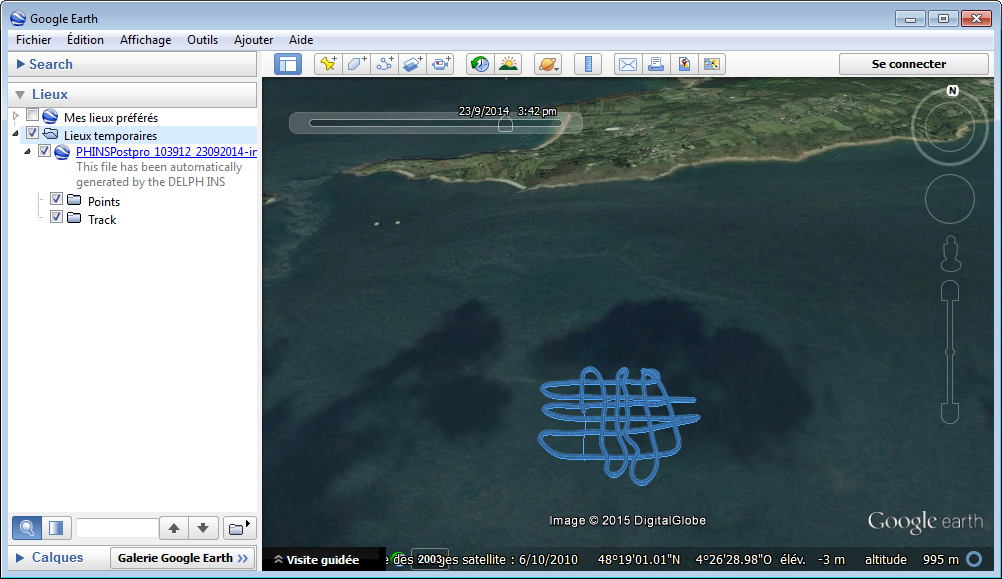
Display of navigation data exported into Google Earth